Dog First Aid: 5 key things to know in a pet emergency

Last week, the team at Yappy enjoyed a crash course in canine first aid thanks to Professional Veterinary Nurse Rachel Bean and her trusty Fox Red Labrador, Chilli. Keep reading as we share the top 5 things we learnt when it comes to dog first aid.
It’s always scary and upsetting to see your dog hurt or in pain, especially if you’re unsure what to do before you seek professional help. As a dog owner, it’s so important to learn the basics when it comes to first aid, as it can be crucial to your pup’s welfare. Rachel did a fantastic job of teaching us basic first aid for emergency situations dog owners may face at home or out and about.
By speaking to us about her experiences as a vet and demonstrating how to perform chest compressions, dog CPR, and wrap bandages for ear and head injuries, we gained valuable knowledge about dog first aid in a clear and engaging way.
Here’s how we got on!
Introducing Rachel Bean RVN

Rachel Bean is a Professional Veterinary Nurse with an impressive 20 years of experience. With a wealth of knowledge when it comes to canines, Rachel’s work has taken her far and wide; from veterinary practises across the UK to the Soi Dog Foundation in Thailand.
An expert when it comes to dog behaviour, Rachel also teaches canine first aid and is a trustee for Street Paws, a charity that helps treat the dogs of the homeless across the UK.
Thanks to Street Paws, free accessible vet care and support is offered to the homeless. For many homeless people, the love and friendship they share with their pets may be the only companionship they have, which is why the work that Street Paws do is incredibly important.
Introducing Chilli

Chilli is a 3-year-old Fox Red Labrador and renowned “super-sniffer”. She’s been trained by Rachel since she was a puppy and is a paw-fessional when it comes to first aid demonstrations.
Rachel’s Top 5 Dog First Aid Tips
1. Don’t panic!
While it’s often easier said than done, panicking won’t help your dog in an emergency situation. You heart rate and blood pressure will increase, and your dog is likely to pick up on this too. Instead, take some deep breaths and try to remain calm while you access the situation and decide your next steps.
2. Remember your ABCs
When it comes to First Aid, there are 3 key things to remember, and it’s as easy as ABC; Airways, Breathing, and Circulation.
First, check your dog is breathing. Watch their chest for movement and put your ear to their nose and mouth and listen. You can also place your hand near their nose and mouth - you’ll be able to feel their breath.
If your dog’s breathing is laboured, this could indicate a blockage. If the blockage is visible, take care to remove it. If it’s not visible, take your dog straight to the vet.
If your pup is conscious, they’re less likely to be in life-threatening danger and you might have time to attend to other injuries they may have.

You should be able to feel your dog’s breath on your hand.
3. Prepare for emergency situations
While nobody likes to plan for the worst, you never know what life may throw at you and your dog, so it’s wise to prepare in the ways you can.
In an emergency situation, you’ll need to pay a visit to your vet, so it’s important to know the answers to these questions before you’re faced with a pet emergency:
Do you know your vet’s number and is it up to date?
Do you know where your vet’s emergency practice is and do you know their opening hours?
Do you have pet insurance – and if so, which type?
Knowing these things is crucial when time is of the essence.
4. How to perform chest compressions and CPR on your dog
If your dog is unconscious or has collapsed, firstly, loosen their collar and check that their airway is open. Pull their tongue forward, extend their neck and keep them warm. Then, carry out the following checks:
Check for your dog’s heartbeat by feeling their heart – located on their chest, behind their elbow.
Check your dog’s pulse – located on the inside of their thigh.
Check your dog’s breathing – place a hand on their chest and feel for movement, also feel for breath from their nose and mouth.
CPR should only be carried out if you can’t feel your dog’s heartbeat, pulse and breath. If this is the case, then start chest compressions immediately.

Check for your dog’s pulse on the inside of their thigh.
The size of your dog and compression technique
For small dogs or puppies
Place two fingers and a thumb over the heart and press hard.

For dogs under 10kg
Place your hands directly over your dog’s heart and press hard.
For dogs over 10kg
Place your hands in the middle part of your dog’s ribcage, the compressions will need to be harder so make sure to lift off the ribcage after each compression and use your weight to push down again.
Don’t worry about hurting your dog with this technique – dogs have a flexible ribcage and it would be difficult to injure them with chest compressions.

Compressions and CPR
Lean over your dog with 1 hand on top of the other. Your shoulders, elbows and wrists should be locked so you can use your weight to press down.
Do 30 quick chest compressions, 2 per second.
Breathe into your dog’s mouth twice. Hold their muzzle with both hands (or one for a small dog) and put your mouth over your dog’s nose, including their nostrils, and gently blow. You should see their chest inflate.
Continue with 30 chest compressions and 2 breaths, then check ABC again (see point 2).
Keep going until you arrive at your vets.
5. How to dress your dog in a bandage
When it comes to dressing your dog in a bandage, start with a conforming bandage layer; start just above the joint that’s injured and work your way up, wrapping the bandage tightly in a figure of 8 pattern, then back down again.
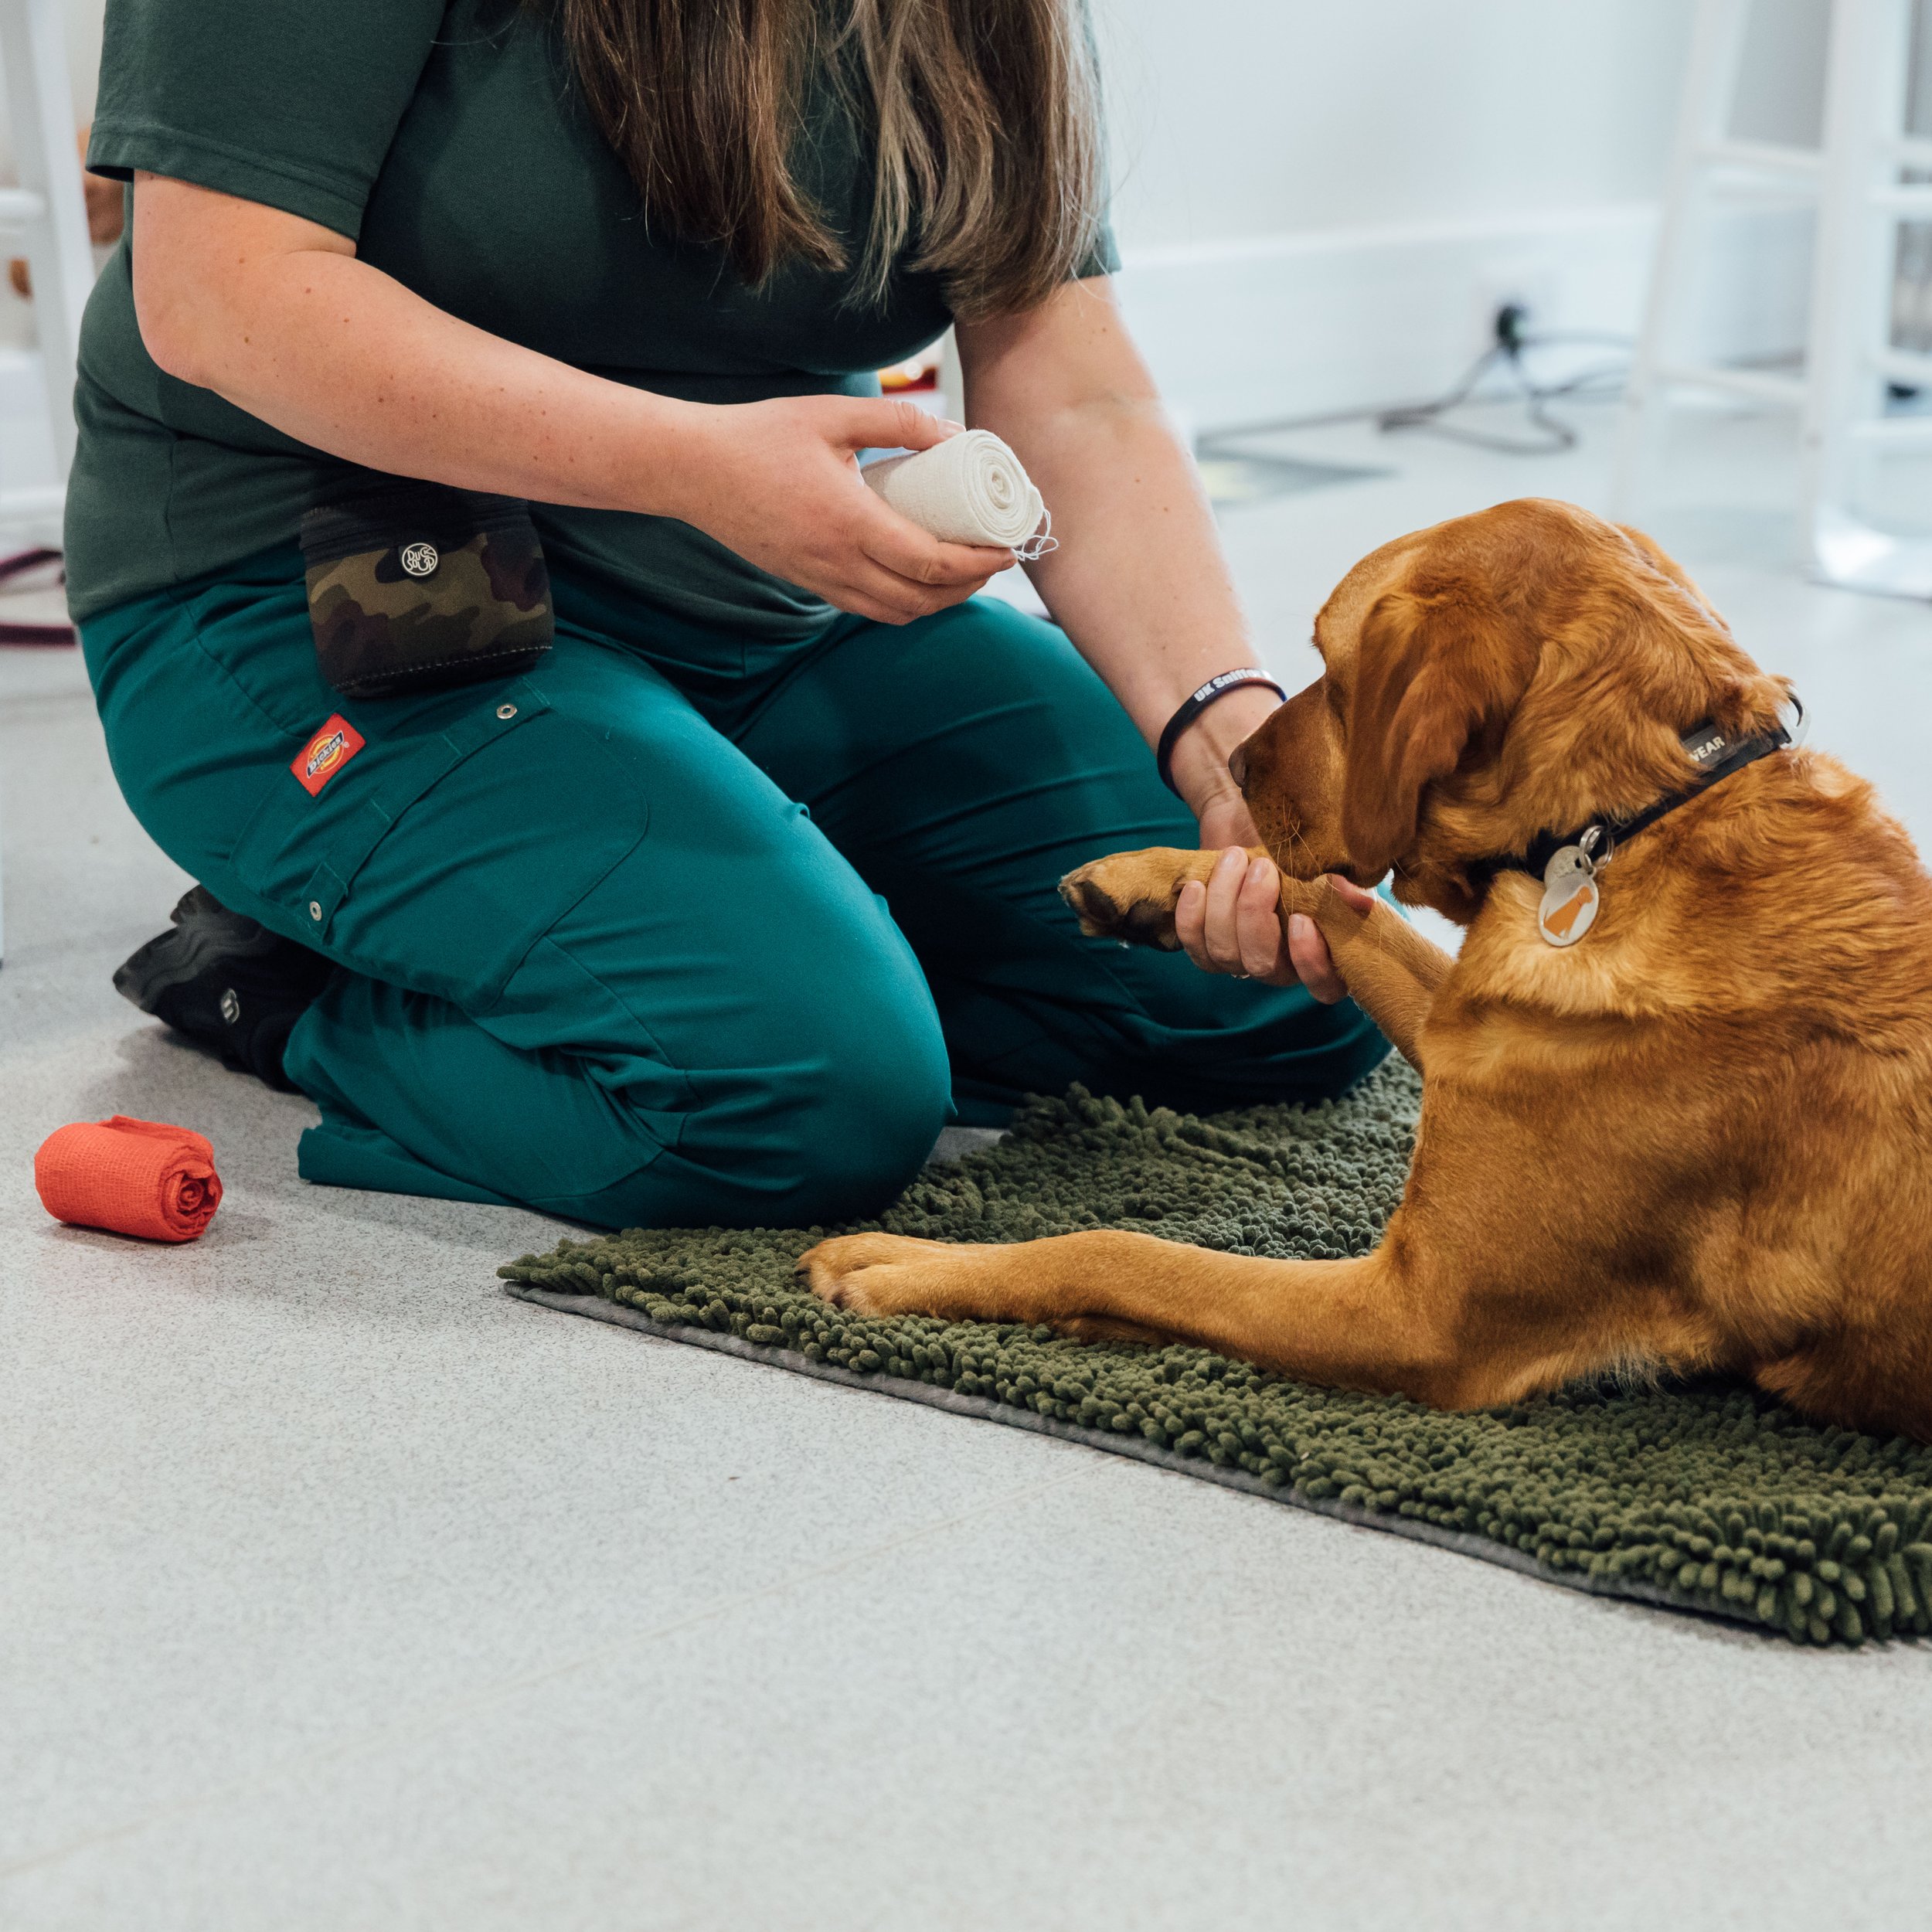

Once you’ve come to the end of the bandage or have used enough, move on to the outer layer.
Roll out some of the bandage to get some of the stretch out of it (so it won’t be too restricting) and wrap the bandage in figure of 8s again, starting at the top and going down at an angle. Secure the bandage with some tape.

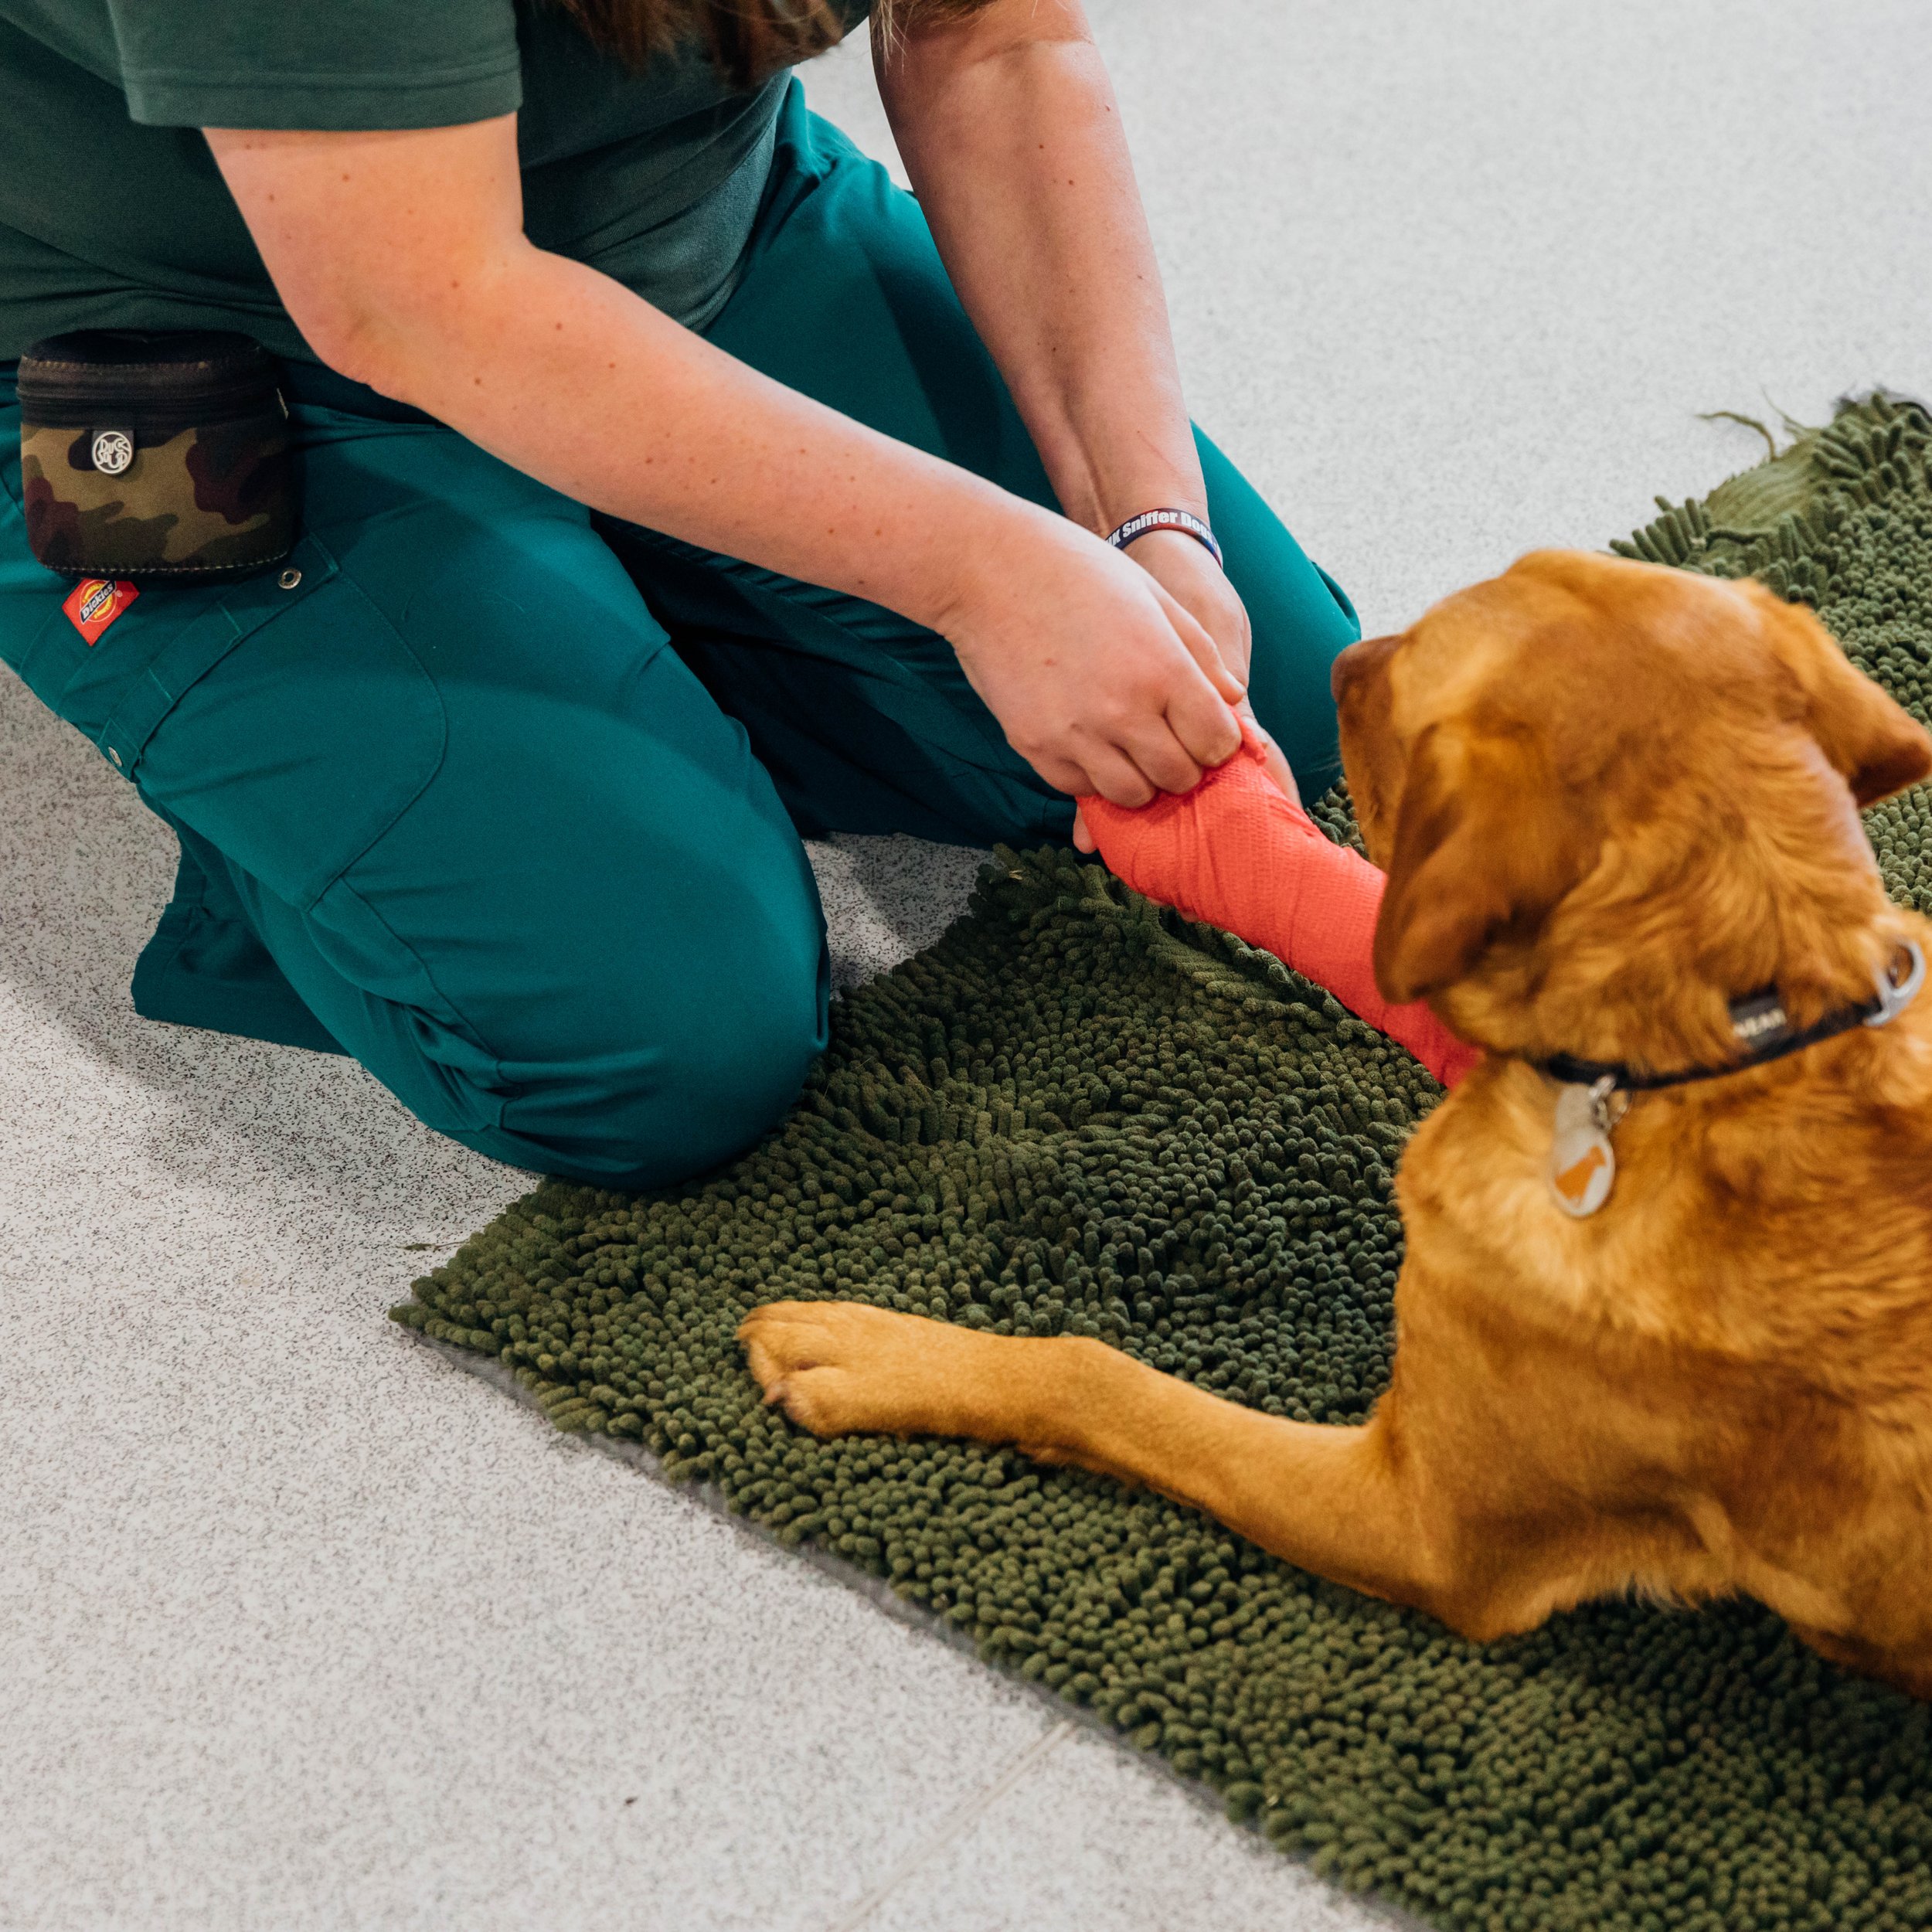
Top Tip: Practise! Dressing your dog in layers of bandages isn’t an everyday activity, but by getting your pup used to this action, they’re likely to be more compliant if you ever have to bandage them.

Everyone at Yappy would once again like to thank Rachel and Chilli for teaching us canine first aid! We now feel more confident in helping our dogs in an emergency situation.
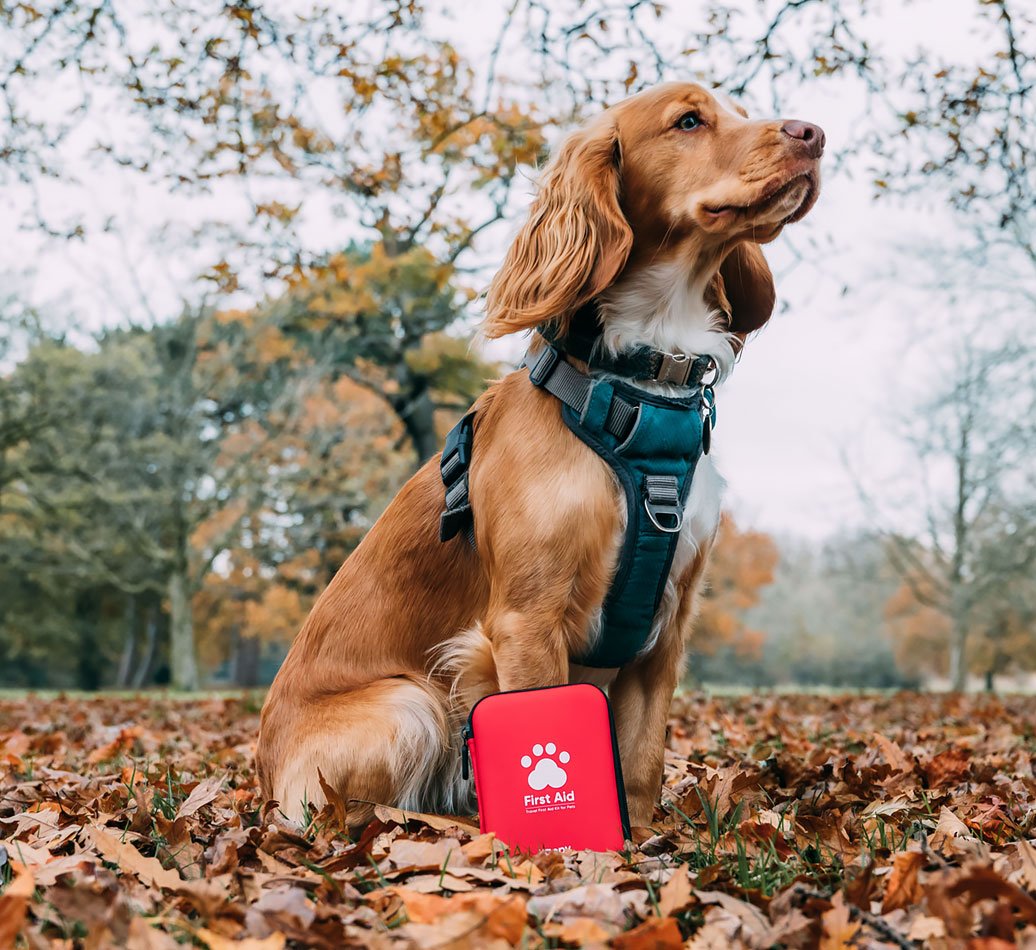
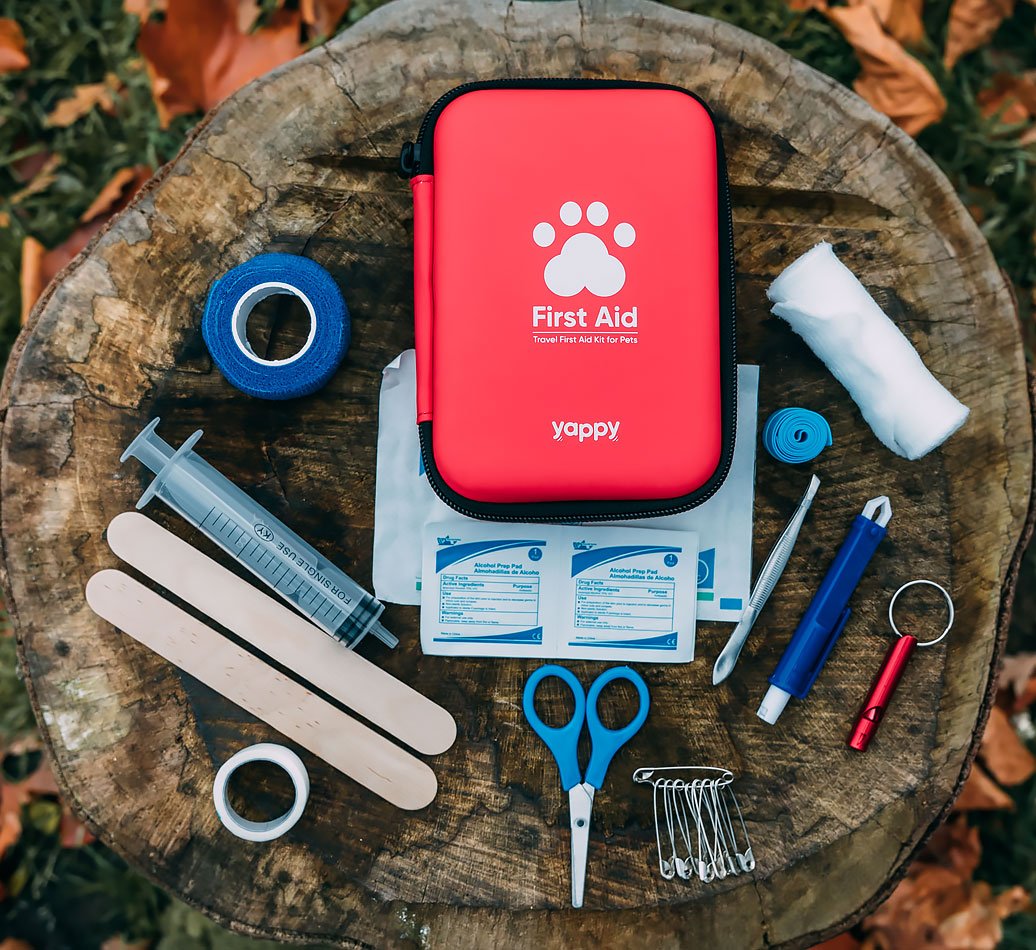
To help care for minor injuries, our First Aid Kit for Dogs is ideal for helping treat your pup at home or on the move.
And for more advice on what to do in a pet emergency, check out these 11 First Aid Tips that could save your dog’s life.
